Magnetic-backed Pods for metallic surfaces
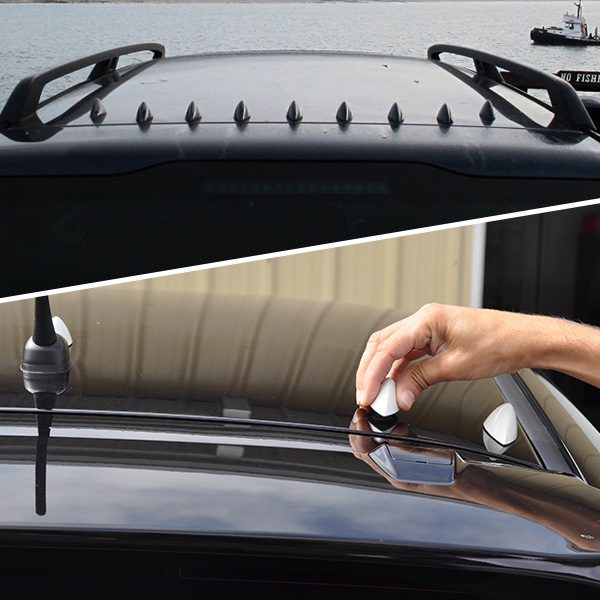
Magnetic-backed Pods can be attached and detached repeatedly. A cushioned, gripping surface pad protects your car’s paint from scratching.
Step-by-step instructions for installation on passenger vehicles for which optimum placement is on the roof or trunk.
AeroHance Pods come in kits of nine and can easily be installed on any passenger vehicle with two attachment options.
Magnetic-backed Pods can be attached and detached repeatedly. A cushioned, gripping surface pad protects your car’s paint from scratching.
Adhesive-backed Pods adhere permanently to fiberglass, stainless steel, polyurethane, or plastic, and are attached with peel-and-stick adhesive that won’t damage paint.
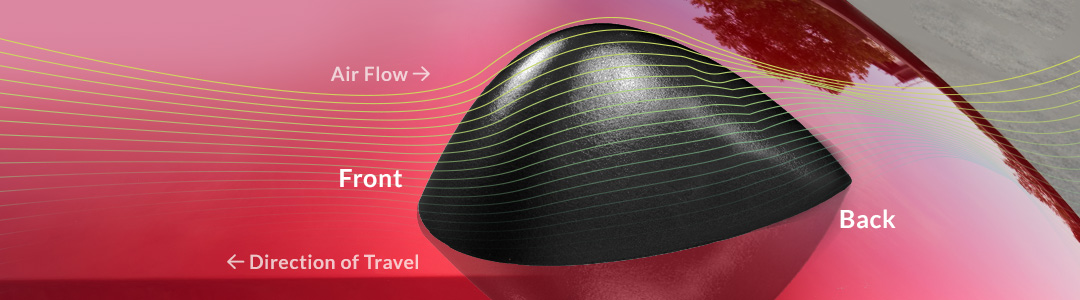
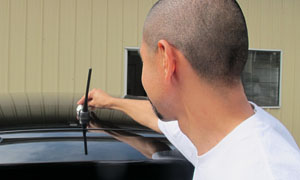
The bulbous shape should be placed facing the front of your vehicle, the pointed end should be placed facing rearward.
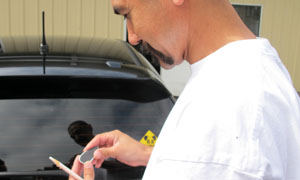
Thoroughly clean the area on the surface of the vehicle where AeroHance Pods are to be placed. Now you’re ready to start installing fuel savers that really work!
Make sure the base pad or tape is securely affixed to the bottom of the bottom of the fuel-saving device.
Place the first AeroHance Pod at the center point between the right and left side of the vehicle.
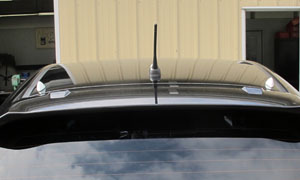
Place a 2nd and 3rd AeroHance Pods on the outside right and left edges of the vehicle.
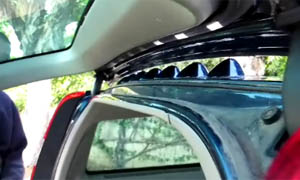
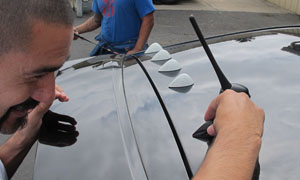
Confirm that the placement of AeroHance Pods allow a full range of movement for doors, windows, or lift gates.
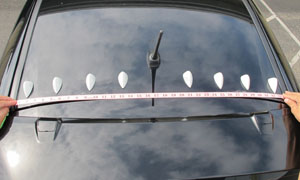
Between the center POD and the right edge POD, create a row of Pods that are equidistant from one another, for most vehicles this will 4 to 5 inches apart. And, then do the same between the center Pod and the left edge POD. Air is dynamic and small variation in placement will not adversely affect aerodynamic performance.

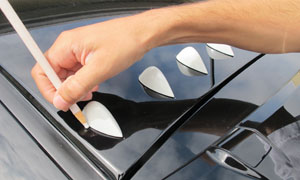
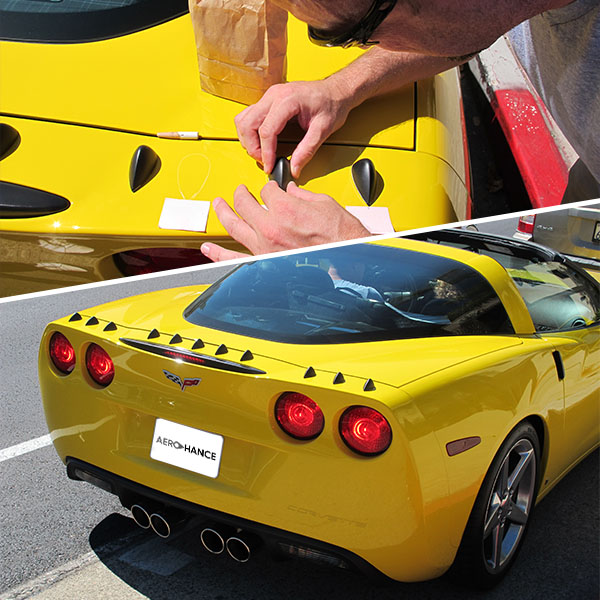
Position the Aerohance Pods on the vehicle as described in steps 1 through 6. Using a wax pencil, or soap wedge trace around each AeroHance Pod, being careful not to move them. Tracing marks can easily be wiped off after installation.
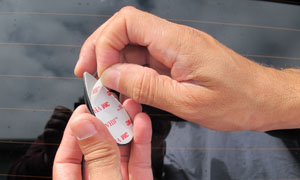
Peel off the covering on the Pods underside to expose the adhesive that will bond the AeroHance Pods to the surface of the vehicle.
Remembering to place the bulbous end of our fuel saving device forward, carefully place each AeroHance Pod inside the area you traced with the wax pencil or soap. Make sure to press down firmly to secure the Pods in place.

Optimum placement is just before smooth air flow running with the car body turns turbulent. One cause of turbulence, or drag, is when the air streaming past the vehicle meets the low pressure (vacuum) that follows behind all vehicles. That low pressure pushes back against the streamline air flow, changing it from laminar (smooth) to turbulent (drag). The engine must work to overcome that drag, which consumes fuel.
Sedan, hatchback, SUV, wagon, for example, with a blunt, vertical rear then, then place array running 7″-10″ forward of the back trunk or the rear roof line.
Compact, Hatchback or SUV with extended round rear, placement is closer to the rear edge.
Place fuel saver on the spoiler or along the rear edge for a coupe.
Air is fluid, so minor variance in placement range will not adversely affect aerodynamic efficiency results.