Installing AeroHance Pods is Easy!
Step-by-step instructions for installation on Trucks, Buses and RVs.
Step-by-step instructions for installation on Trucks, Buses and RVs.
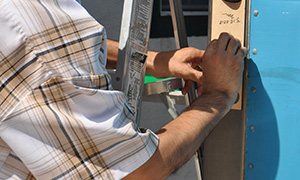
Print out Template on card stock at actual size. Do not scale. Confirm pattern printed 4″ from AeroHance Pod tip to next AeroHance Pod tip. Cut pattern out along Lines as shown.
Front & Back of AeroHance Pods
The bulbous shape on our fuel saving devices should be placed facing the front of your vehicle, the pointed end should be placed facing rearward.

Step 1: Clean the Area
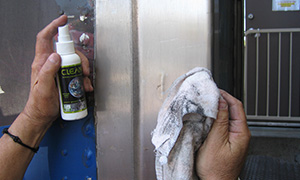
Thoroughly clean the area on the surface of the vehicle where AeroHance Pods are to be placed.
Step 2: Check Base Pad or Tape
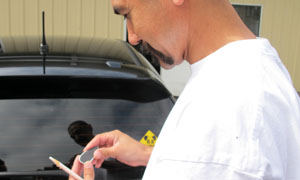
Make sure the base pad or tape is securely affixed to the bottom of the fuel-saving device.
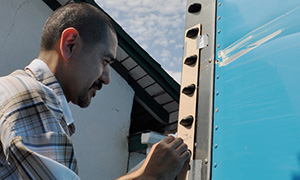
Step 3: Place the First AeroHance Pod
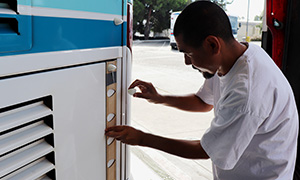
Place the first AeroHance Pod, bulb shape to front. Pointy tip to rear. Place pattern 1 over 1st installed AeroHance Pod.
Step 4: Place AeroHance Pods along the pattern
Place a 2nd and 3rd AeroHance Pods in pattern placements 2 and 3.
Step 5: Replace AeroHance Pod pattern
Remove pattern and place pattern 1 over GasPod 3. Install GasPod 4 and 5 in pattern 2 and 3
Step 6: Repeat Pattern
Repeat by placing Pattern 1 over last installed GasPod. then placing next 2 in Pattern 2 and 3 until all GasPods are installed.
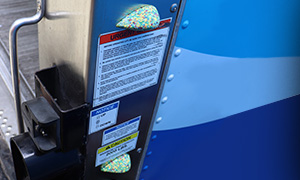
Skip any areas with “warnings” posted or before hinges, See picture:
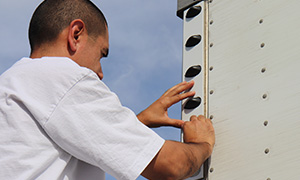
Step 9: Secure AeroHance Pods
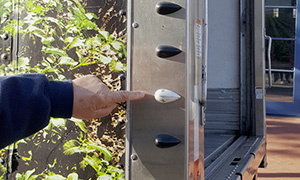
Remembering to place the bulbous end of the Pods forward, carefully place each AeroHance Pod inside the area you traced with the wax pencil or soap. Make sure to press down firmly to secure the Pods in place.
AeroHance Pod Installation Complete!
